adza
Regular Member
Build in progress...
Posts: 189
|
Post by adza on Dec 8, 2009 20:48:53 GMT 10
Well ive gone and done it. It was a big decision for me. I began pulling the bike down. Ive certainly never done anything like this before. Never done more than pull the fairing off to fit flushmounts and pulled the tail plastic off to replace the rectifier. But im very excited. I hesitate to call this build a fighter cause i dont want to offend any die hards out there. It wont be radical but one of the main things i will do is replace the sub frame and tail with something i think is much better... Much of what i plan on doing is all of those small things which can be found on this site or the super hawk one. Things like: APE manual CCT's Get rid of that lip in the exhaust Ohlins springs up front braided brake lines and maybe calipers spacer for the rear 520 chain and shorter gearing  fix the shift with some heim joints stuff i cant think of at the moment and some fighterish stuff as well... I decided cause i love riding the storm, but it could be better. and to be honest, im not a huge fan of the faired look. But i think they look awesome fightered. And yes, looks r important to me in a way. I admit it. And all of those good sports twins r too expensive i reckon. Ive rambled enough, here a few pics from today... with fairing off.. 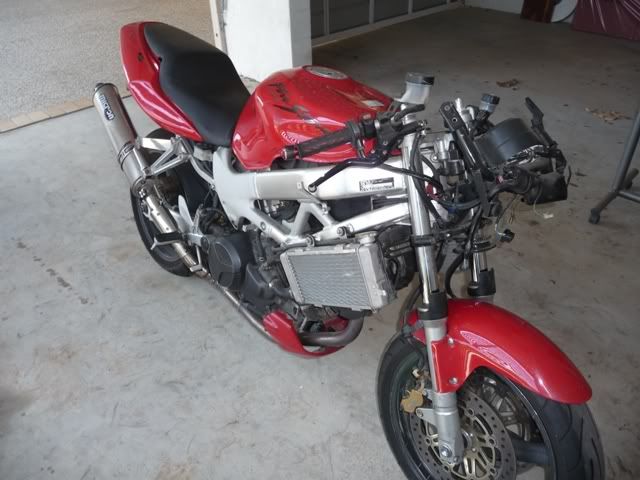 further stripped with RHS radiator dummy positioned in front to check out clearances and fitment.. 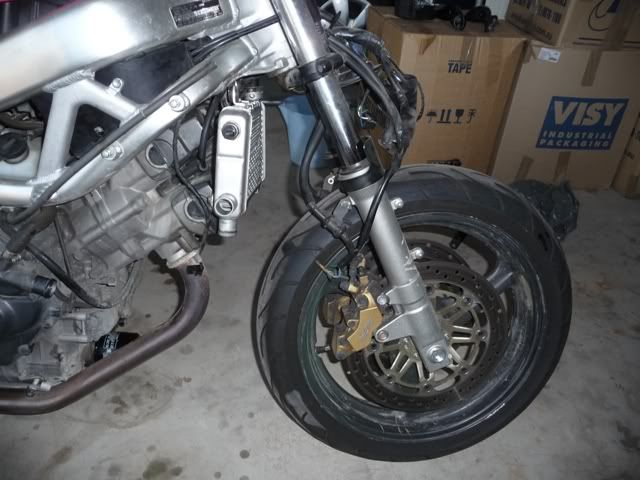 and the original hoses fit! on both sides! 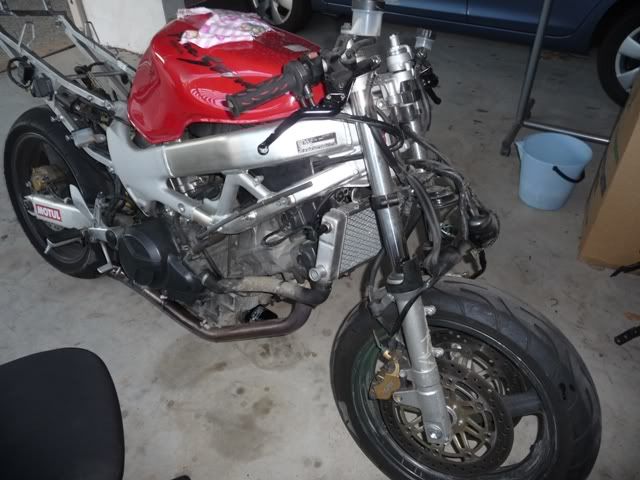 will end up getting new hoses though and this is how my day ended up 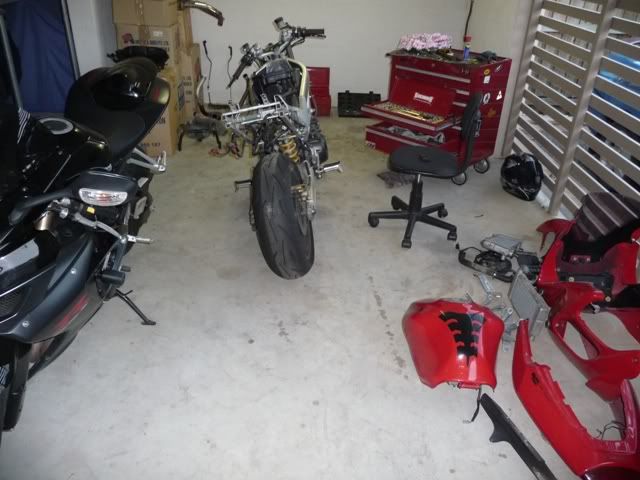 so the headers, oil cooler, radiators and fuel tank are off. I think tomorrow will be off with rest of the fuel/intake system and will start cleaning. Depending how I go, might take the engine out. I want to powder coat the frame and swingarm, or paint eventually. and paint the engine. I want to order the APE's this week and get mounts for radiator and oil cooler made. Unfortunately i have no gear for that so will have to pay for them. When i do the APE's will check valve clearances. Do any of you have any other suggestions for things to do or check while the engine is out? Well, thats all for now. I will share my progress here for those interested and in return i will be asking for advice and questions cause this is the first time ive ever done anything like this before! Im excited! This will be a bike i keep for a long time ;D |
|
|
|
Post by Fozzy Bear on Dec 8, 2009 20:59:11 GMT 10
Get rid of that lip in the exhaust There were different schools of thought about this lip. Colin reckons its there by design and should be left alone. I had a good look at mine whilst the pipes were off and realised it is just a byproduct of cheap manufacturing by Honda. The collector pipe is shoved into the y piece so that connects by about a centimetre on the LHS (as it should) They were just too cheap to trim the pipe on the RHS and just left it half covering the RHS hole. Once I realised this, it was out with the holesaw set and about 15 mins later it was gone. Gives a slightly deeper exhaust note and a nice bit of added poke in the midrange (destroyed the holesaw in the process, though it was from work so who cares?) |
|
adza
Regular Member
Build in progress...
Posts: 189
|
Post by adza on Dec 8, 2009 21:03:49 GMT 10
yeah i filed about half of it off by hand in the past... took f--king forever  will use a better tool before i tackle it again. i think getting rid of it is the way to go. it just looks like poor workmanship. |
|
|
|
Post by fail on Dec 9, 2009 7:11:42 GMT 10
Congrats and welcome to the naked club  |
|
shayne
Omnipresent
1998 Blueprint
Posts: 8,639
|
Post by shayne on Dec 9, 2009 9:50:52 GMT 10
To do what you suggest will mean you will have to remove the wiring loom. Before you start separating the frame from the engine, make sure you take pictures of where the wiring loom goes.
It is easy enough to connect everything up again when you are re-assembling if you mark everything correctly, but routing the cables is harder than you think, so it will be best to run them exactly where the factory does.
|
|
adza
Regular Member
Build in progress...
Posts: 189
|
Post by adza on Dec 9, 2009 10:08:23 GMT 10
Cheers fail ;D happy days
Shayne, thanks for the pointer. Will do that then for sure.
im off to have a fiddle.... um, continue pulling it down.
|
|
cheekybugger
True Stormer
98' Black - Needs a Wash . . . Sold. 2014 899 Panigale.
Posts: 1,156
|
Post by cheekybugger on Dec 9, 2009 15:19:09 GMT 10
Looks like fun to me :-)
Keep up the good work.
|
|
|
|
Post by johnno88 on Dec 9, 2009 18:44:52 GMT 10
Get rid of that lip in the exhaust There were different schools of thought about this lip. Colin reckons its there by design and should be left alone. I had a good look at mine whilst the pipes were off and realised it is just a byproduct of cheap manufacturing by Honda. The collector pipe is shoved into the y piece so that connects by about a centimetre on the LHS (as it should) They were just too cheap to trim the pipe on the RHS and just left it half covering the RHS hole. Once I realised this, it was out with the holesaw set and about 15 mins later it was gone. Gives a slightly deeper exhaust note and a nice bit of added poke in the midrange (destroyed the holesaw in the process, though it was from work so who cares?) Could it be possible Fozzy that the pipe was inserted in that distance for a reason? I'm contemplating on removing it aswell. Johnno88 |
|
shayne
Omnipresent
1998 Blueprint
Posts: 8,639
|
Post by shayne on Dec 10, 2009 15:29:28 GMT 10
It is possible, and some people believe it is better left in there. I believe it is done like this as the bike is built to a price. I say remove it.
|
|
|
|
Post by Fozzy Bear on Dec 10, 2009 17:04:21 GMT 10
Could it be possible Fozzy that the pipe was inserted in that distance for a reason? I'm contemplating on removing it aswell. Johnno88 Nah, I reckon its just there because it would be cheaper and easier manufacturing. If they inserted the pipe so it didn't half cover the hole, there would be a gap on the LHS of the join |
|
|
|
Post by vtrfighter on Dec 10, 2009 19:23:07 GMT 10
Welcome Adza to our little club |
|
|
|
Post by binny on Dec 10, 2009 19:23:19 GMT 10
A workmate has a cbr1100xx black bird and it has a similarly crappy collector. Well not any more he just fitted a yoshi 4 into 1 system and reckons the increase in midrange is incredible.
|
|
adza
Regular Member
Build in progress...
Posts: 189
|
Post by adza on Dec 11, 2009 15:13:03 GMT 10
Well, im just about set up with an ingenious and cheap hoist type set up to pull the engine out and swingarm off (pics to follow when i got more time), and realised i'll be needing two special tools to unbolt the engine from the frame. So i call up Mr Honda to price one and just one is 180 bucks!!!!!!!!!!!!!!!!  Its the size of a 19mm socket!!!!!!!!!!!! so im ringing around the wreckers to try my luck or will hav to make one out of a normal socket... damn |
|
cheekybugger
True Stormer
98' Black - Needs a Wash . . . Sold. 2014 899 Panigale.
Posts: 1,156
|
Post by cheekybugger on Dec 11, 2009 18:43:11 GMT 10
I've done an engine removal twice now and not needed anything special (that I can remember).
Where abouts is this socket for?
|
|
adza
Regular Member
Build in progress...
Posts: 189
|
Post by adza on Dec 11, 2009 22:20:46 GMT 10
I've done an engine removal twice now and not needed anything special (that I can remember). Where abouts is this socket for? Its for the three bolts either side of the frame. If u look at your frame u will see the nuts have another type of nut surrounding it with spots for four lugs. I had no luck with the wreckers or ebay so will get a couple of cheap sockets tomorrow and hit them with the angle grinder. In case anyone is interested, a size 19mm and 23mm will do the job. Just need to grind the head down so u have four lugs sticking out. |
|
adza
Regular Member
Build in progress...
Posts: 189
|
Post by adza on Dec 11, 2009 22:59:01 GMT 10
I found the weirdest thing after taking off the carbies... Have a look in the circle 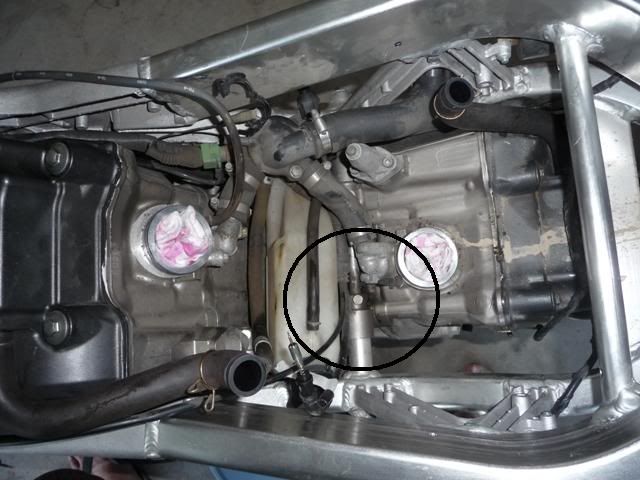 and closer  yes, its an energizer AAA battery. i have no idea how long thats been down there. It was a past owner so it couldve been there for a very long time. I wonder what would happened if it had exploded from the engine heat. the fual tank is right there... and here is my custom home configured hoist ;D front wheel is chocked into the corner. supported from above, jack underneath. 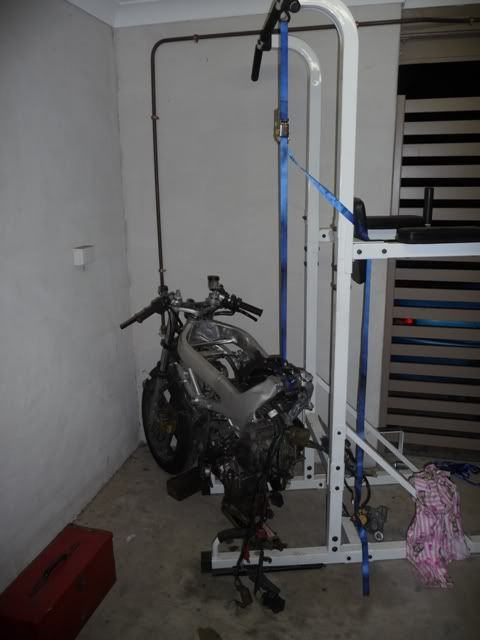 and swingarm and rear suspension out. Gets dirty in behind there. 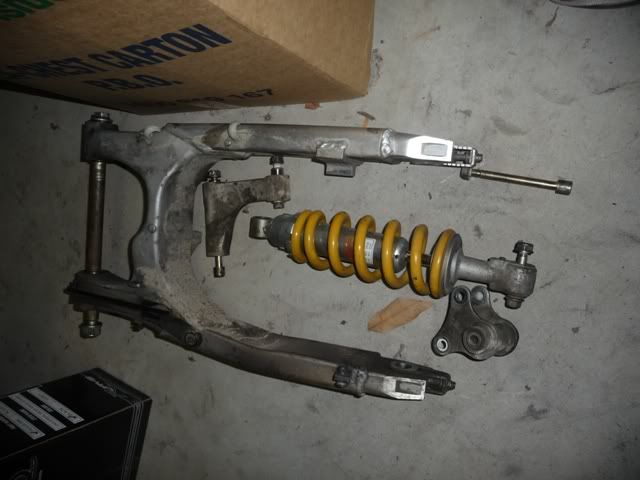 I had all sorts of weird and imaginative ideas about how the hell am i gonna be able to hold the frame up from above. i needed the jack to support the engine after removing the bolts. after much brain power i had a light bulb moment and thought to use the chin up tower. and it was a much safer option than some of the other options...  so after making up those tools tomorrow i should be able to drop the engine out along with the forks. and that will then be fully pulled down. then its cleaning, checking tolerances and stuff and rebuilding. happy days ;D even if i stop now and put it back together, ive already learnt so much more about the bike. its very worthwhile me thinks. i think the bike and i are actually bonding |
|
malone
Honourable Member
07 Shiny Black
Posts: 836
|
Post by malone on Dec 12, 2009 8:31:01 GMT 10
A friend has just recently removed and refitted the engine in a project bike he is doing - went to great lengths, like you, in taking it out and then was given a tip off another forum for easy removal and refitting .... all you need to do, he said, is to remove the mount bolts from one side of the engine - lay the bike on that side on the floor - remove the rest of the bolts - then stand the frame up leaving the engine on the floor - ingenious I thought - not sure if it would be suitable for the Storm tho ........
|
|
shayne
Omnipresent
1998 Blueprint
Posts: 8,639
|
Post by shayne on Dec 12, 2009 18:17:41 GMT 10
Support the engine and then unbolt the frame from it, leaving the engine behind. Easy enough to do.
|
|
adza
Regular Member
Build in progress...
Posts: 189
|
Post by adza on Dec 13, 2009 18:46:09 GMT 10
well i saved about 360 bucks by NOT buying the genuine Honda tools for removing the nuts on the LHS of the frame. Made them out of 19mm and 22mm (NOT 23mm like i mentioned earlier). here is where those three nuts are which mount the engine to the frame on the LHS for those interested 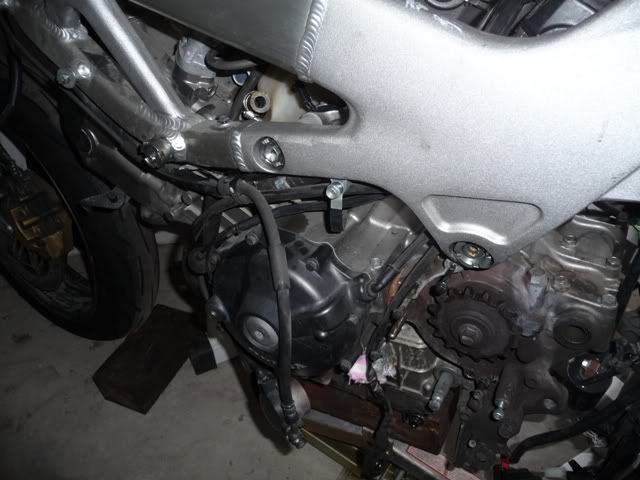 and my home made tool 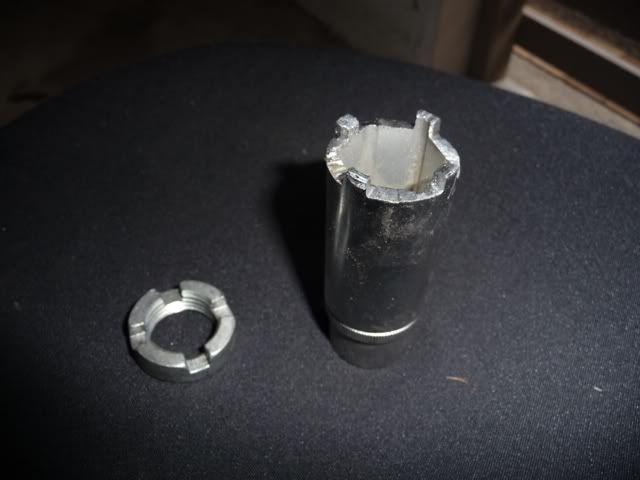 and a pretty good fit. i am happy with how they turned out 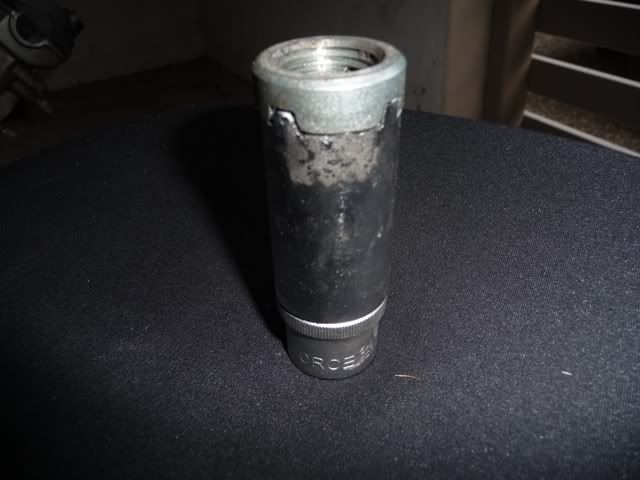 with the right size sockets, an angle grinder, a big file and a black marker texta, i thoroughly recommend going this route and give Mr Honda a miss. tell him he's dreaming... wiring harness out. 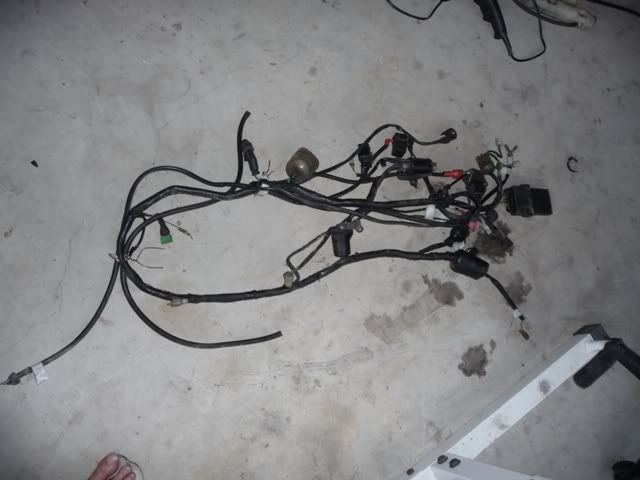 doesnt a bike just have a battery and two spark plugs, a headlight and some indicators? so much more to it than one would first think. not sure if i will replace at this stage. will consider that later upon a closer inspection. and the beautiful v-twin donk 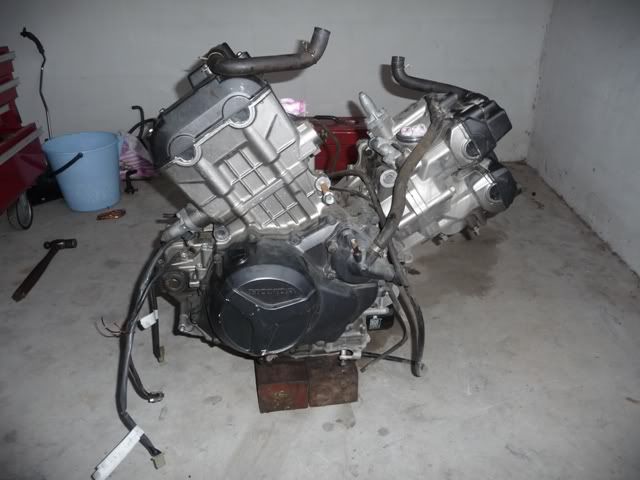 and whats left of the bike 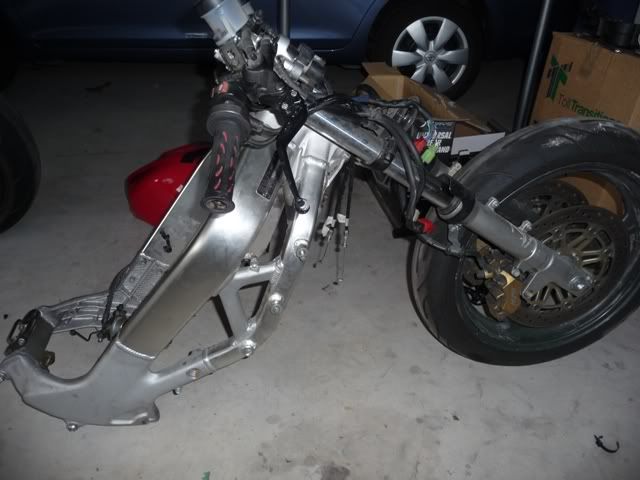 the engine came out ok with a bit of fiddling around. just had to manoeuvre the frame rearward or the engine forward to clear the rear of the mounting brackets on the frame around the rear head/section of the engine. apart from that, piece of cake. just need to take the front wheel off and the forks out and its time to build ;D |
|
|
|
Post by vtrfighter on Dec 13, 2009 20:34:24 GMT 10
Well done mate...wish i had the bollocks to dive in like you have |
|
|
|
Post by fail on Dec 14, 2009 7:22:57 GMT 10
Well done mate...wish i had the bollocks to dive in like you have +1 .. Bowdown to you good sir. Wish I had the tools/know-how/garage to do that so I could paint my damn frame. |
|
adza
Regular Member
Build in progress...
Posts: 189
|
Post by adza on Dec 14, 2009 11:45:13 GMT 10
haha cheers boys. it was actually reading the exploits of u guys tinkering with your storms that provided that final encouragement to get started. and i feel a real desire to play with my tools. havnt used them properly since i used to rebuild and rewind electric motors and generators in a past life.. though the internal combustion engine is a different animal altogether. honestly though, pulling the bike down has been pretty simple so far. i have been following the Hayes book sprinkled with a little bit of common sense. its all you need. |
|
|
|
Post by FrillyBoBkinS on Dec 15, 2009 13:59:32 GMT 10
haha cheers boys. it was actually reading the exploits of u guys tinkering with your storms that provided that final encouragement to get started. and i feel a real desire to play with my tools. havnt used them properly since i used to rebuild and rewind electric motors and generators in a past life.. though the internal combustion engine is a different animal altogether. honestly though, pulling the bike down has been pretty simple so far. i have been following the Hayes book sprinkled with a little bit of common sense. its all you need. Im the same as the others, I admire your courage I could strip a bike in no time me thinks, but the putting it back together is where id have some serious issues As it is now when I do small bike jobs (for some reason I am way more confident working with cars than bikes) and large car jobs, I spend more time labeling everything and taking pictures and setting different areas out in their respective colour buckets than I do actually working I need to leave a crumb trail to get back especially if the job is going to spread over time. So yeah, Im the same I tip my hat to you for having a go instead of the dial 1300buildmybikeforme. . |
|
adza
Regular Member
Build in progress...
Posts: 189
|
Post by adza on Dec 15, 2009 18:30:52 GMT 10
Well the forks are out and front wheel off. Its pretty much stripped now. And FrillyBoBkins, as i look at the Storm spread across the floor, i thought, "how the hell am i gonna put that all back together?"  And i came up with the first issue today. Already. As i was cleaning some items up, i noticed some apparent abnormalities with the swingarm. Im almost certain its no good. There appears to be a big ding on the inside of each leg of the swingarm. It doesnt look normal. Cant believe i didnt notice it til now. I am almost positive that the swingarm is not like that normally (maybe as a clearance thing?) i couldnt find any pics here that clearly showed the inside.. The pictures will explain, inside of LHS (rather obvious) 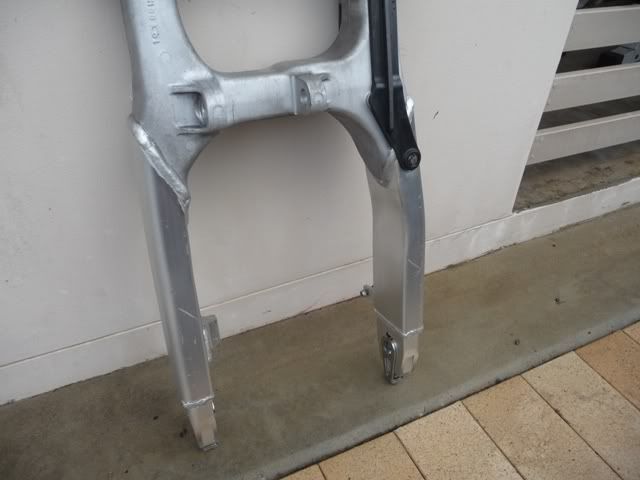 and inside of RHS (less obvious) 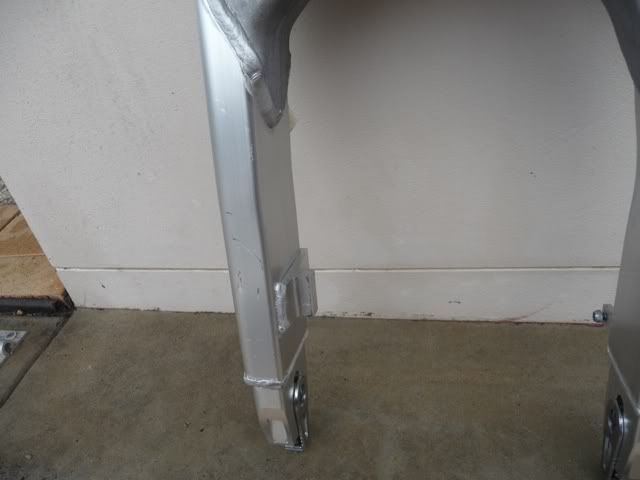 Hope the pics show the bends enough. I need another Storm owner to please confirm that the inside of the swingarm is dead straight. no dings or bends or anything like in the pics. Thanks in advance!!! Cheers |
|
|
|
Post by vtrfighter on Dec 15, 2009 19:36:25 GMT 10
haha cheers boys. it was actually reading the exploits of u guys tinkering with your storms that provided that final encouragement to get started. and i feel a real desire to play with my tools. havnt used them properly since i used to rebuild and rewind electric motors and generators in a past life.. though the internal combustion engine is a different animal altogether. honestly though, pulling the bike down has been pretty simple so far. i have been following the Hayes book sprinkled with a little bit of common sense. its all you need. Common sense you say? well.....that counts me out! oh, and calm down too, swingarm is suppose to be like that... |
|
cheekybugger
True Stormer
98' Black - Needs a Wash . . . Sold. 2014 899 Panigale.
Posts: 1,156
|
Post by cheekybugger on Dec 15, 2009 19:37:23 GMT 10
Both the swing arms I have have the cavities on the inside of the slight bends at the forward edge of the arms.
Hope that saves you some consternation.
|
|
adza
Regular Member
Build in progress...
Posts: 189
|
Post by adza on Dec 16, 2009 10:22:04 GMT 10
phew cheers boys. thought for sure it was no good hehe. thanks heaps!!!!!!!!!!! |
|
adza
Regular Member
Build in progress...
Posts: 189
|
Post by adza on Dec 19, 2009 14:15:48 GMT 10
Well the major bits have all been degreased and cleaned. just ordered the very first bits for the rebuild ;D
got a couple APE manual CCT's and that factory pro evo shift kit thingy. will prob get them in a couple weeks or so. how exciting! well, for me it is anyway. and that is all i can do until after NYE (cashflow). im wondering what else to do with the engine while it is out...
ive been looking through the Haynes manual to see what things i can check while the engine is out. Seems special instruments are needed for the most part. will consider the cost/benefit of such things after NYE. should i take the camshafts out and get them reground to provide a bit more HP? should i take the heads to a shop to get the springs and valves checked? maybe flowed a little while they're there? just wondering what would be some low cost sensible things to do while it is out. ideas anyone?
i think first thing after NY is take the frame and swingarm to the powdercoaters for some black action ;D
|
|
shayne
Omnipresent
1998 Blueprint
Posts: 8,639
|
Post by shayne on Dec 21, 2009 17:12:23 GMT 10
This is really all about money - sorry to say it.  What is the engine build budget? That will determine what you can do. |
|
adza
Regular Member
Build in progress...
Posts: 189
|
Post by adza on Jan 13, 2011 14:58:05 GMT 10
Well, its been a while... last year was busy... got married, honeymoon... back to financial $0... but it was all worth it. Now back to the bike build. There is not a whole lot I can do atm due to funds shortages however, I have been pondering this for quite a while. At the image below, I am going to be cutting off the two lugs that connect the headlight/dash assembly (wont be needing that). I am wondering what the legalities r of not having a steering lock? I am after a 100% legal bike, (besides being a bit loud maybe...). I can fit an ignition key anywhere really. And I wil always be using a kriptonite disc lock as well. 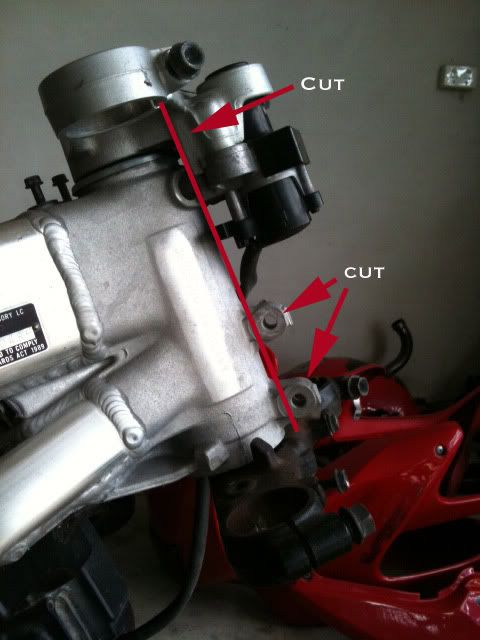 The reason I want it gone is so that I can fit my headlight closer to the forks and have room for a Vapor gauge set up and still have it all tidy. I am in QLD. If I cut off the whole ignition housing it will free up a LOT of space. I am carefully thinking things through before i go nuts with the angle grinder and the get the frame ready for painting. |
|


 Oooops.


 [/URL]